
Creating an audit policy
Example
If, in your access control design you determined that all freelancers within your network should be unable to modify project information and you would like to verify that policy with current permissions within the network. All freelancers are located in a communal group; project information is kept in the projects folder on a data server. First you will have to define the filters that make up the policy:
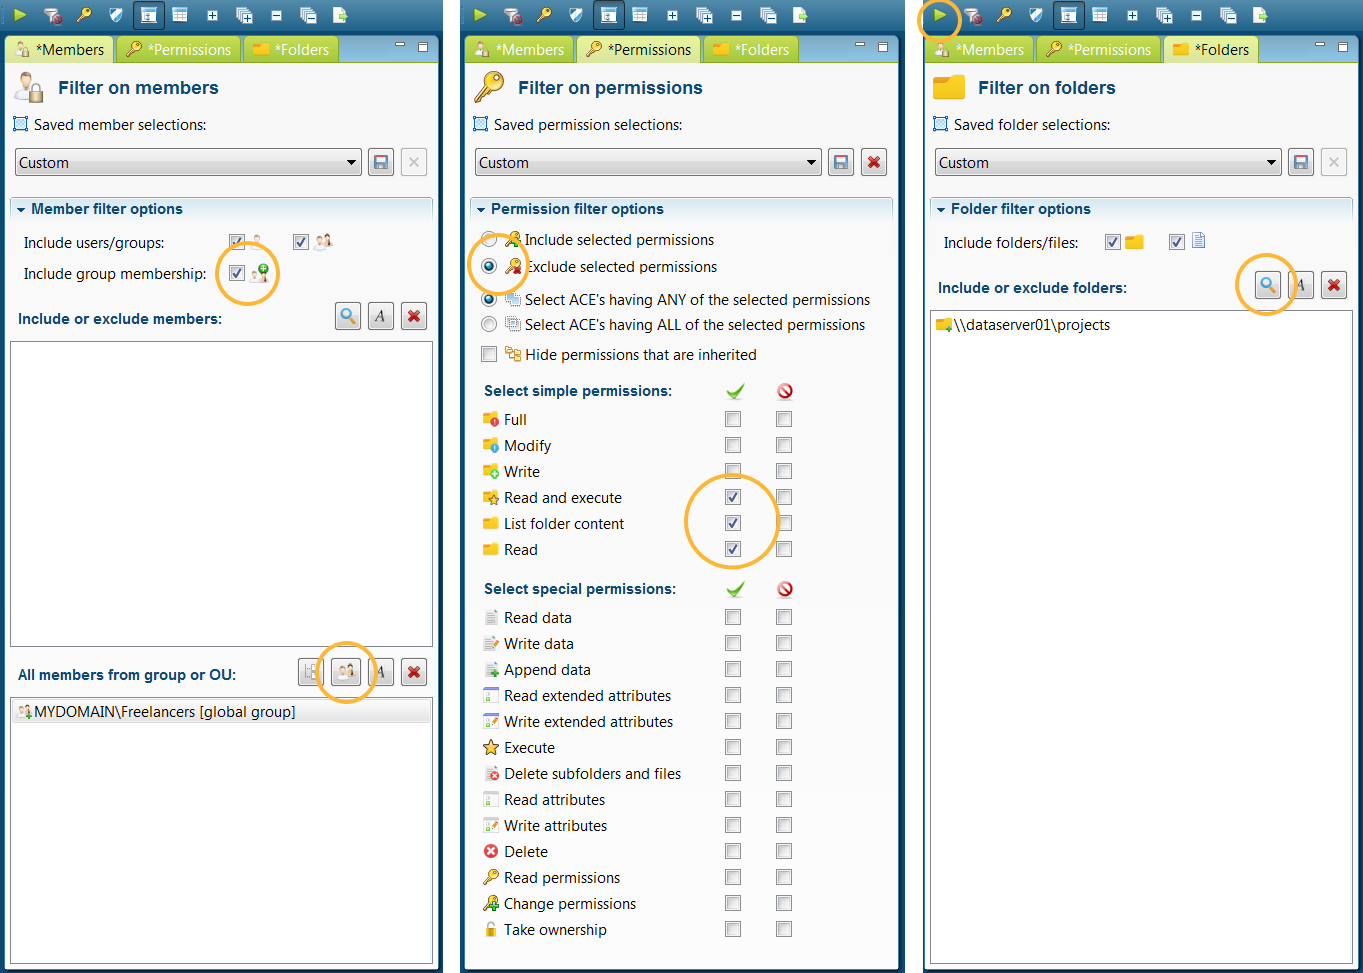
- Select Freelancers from the Members tab and add this group to the bottom selection list (see screenshot). This will not filter for the group itself but for all the members of that group. Nested group membership will automatically be taken into account for each group member when determining permissions.
- In the Permissions tab select the Exclude option and select all reading privileges. These, after all, are privileges that Freelancers have been granted and as such should be excluded from the policy report.
- In the Folders tab select the \\datasever01\projects folder. Your search results will then be scoped to that specific folder.
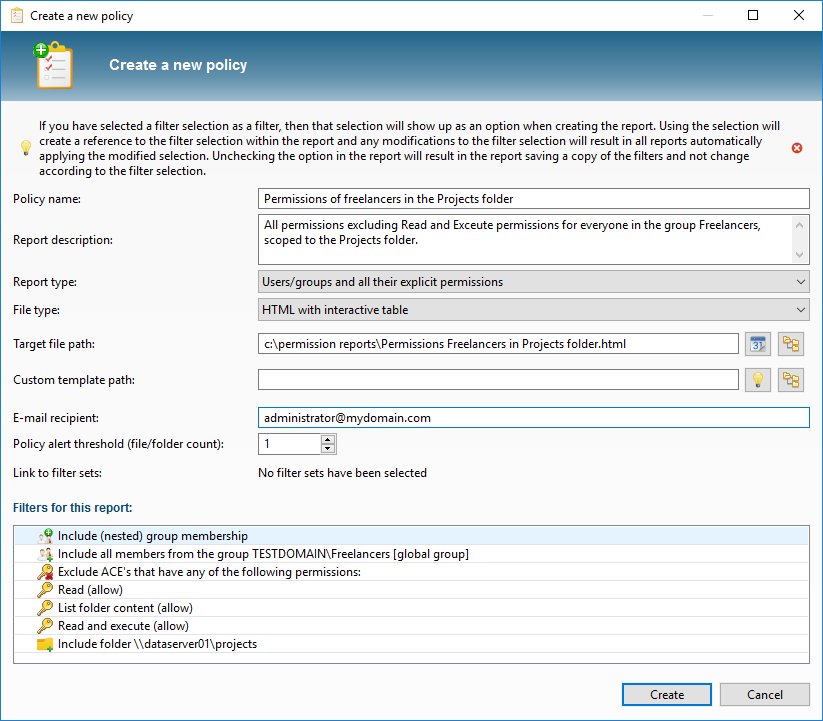
Review your search results by applying the filters using the Apply filters button. If necessary, add new filters, e.g. an Exclude filter for one or more users. Ideally, the result field will remain empty, meaning that no unwanted permissions have been found and that your policy has been implemented completely. Should you have any search result items that appear as exceptions, then simply raise the threshold value for e-mail notification in the report. The threshold value determines the number of files or folders notifications that are sent and can be configured in the Policy alert threshold field. For a policy you will only want a notification if a minimum number of files is found, so you would set the value at 1 or more. Once your search results are satisfactory, save your filters as a new policy:
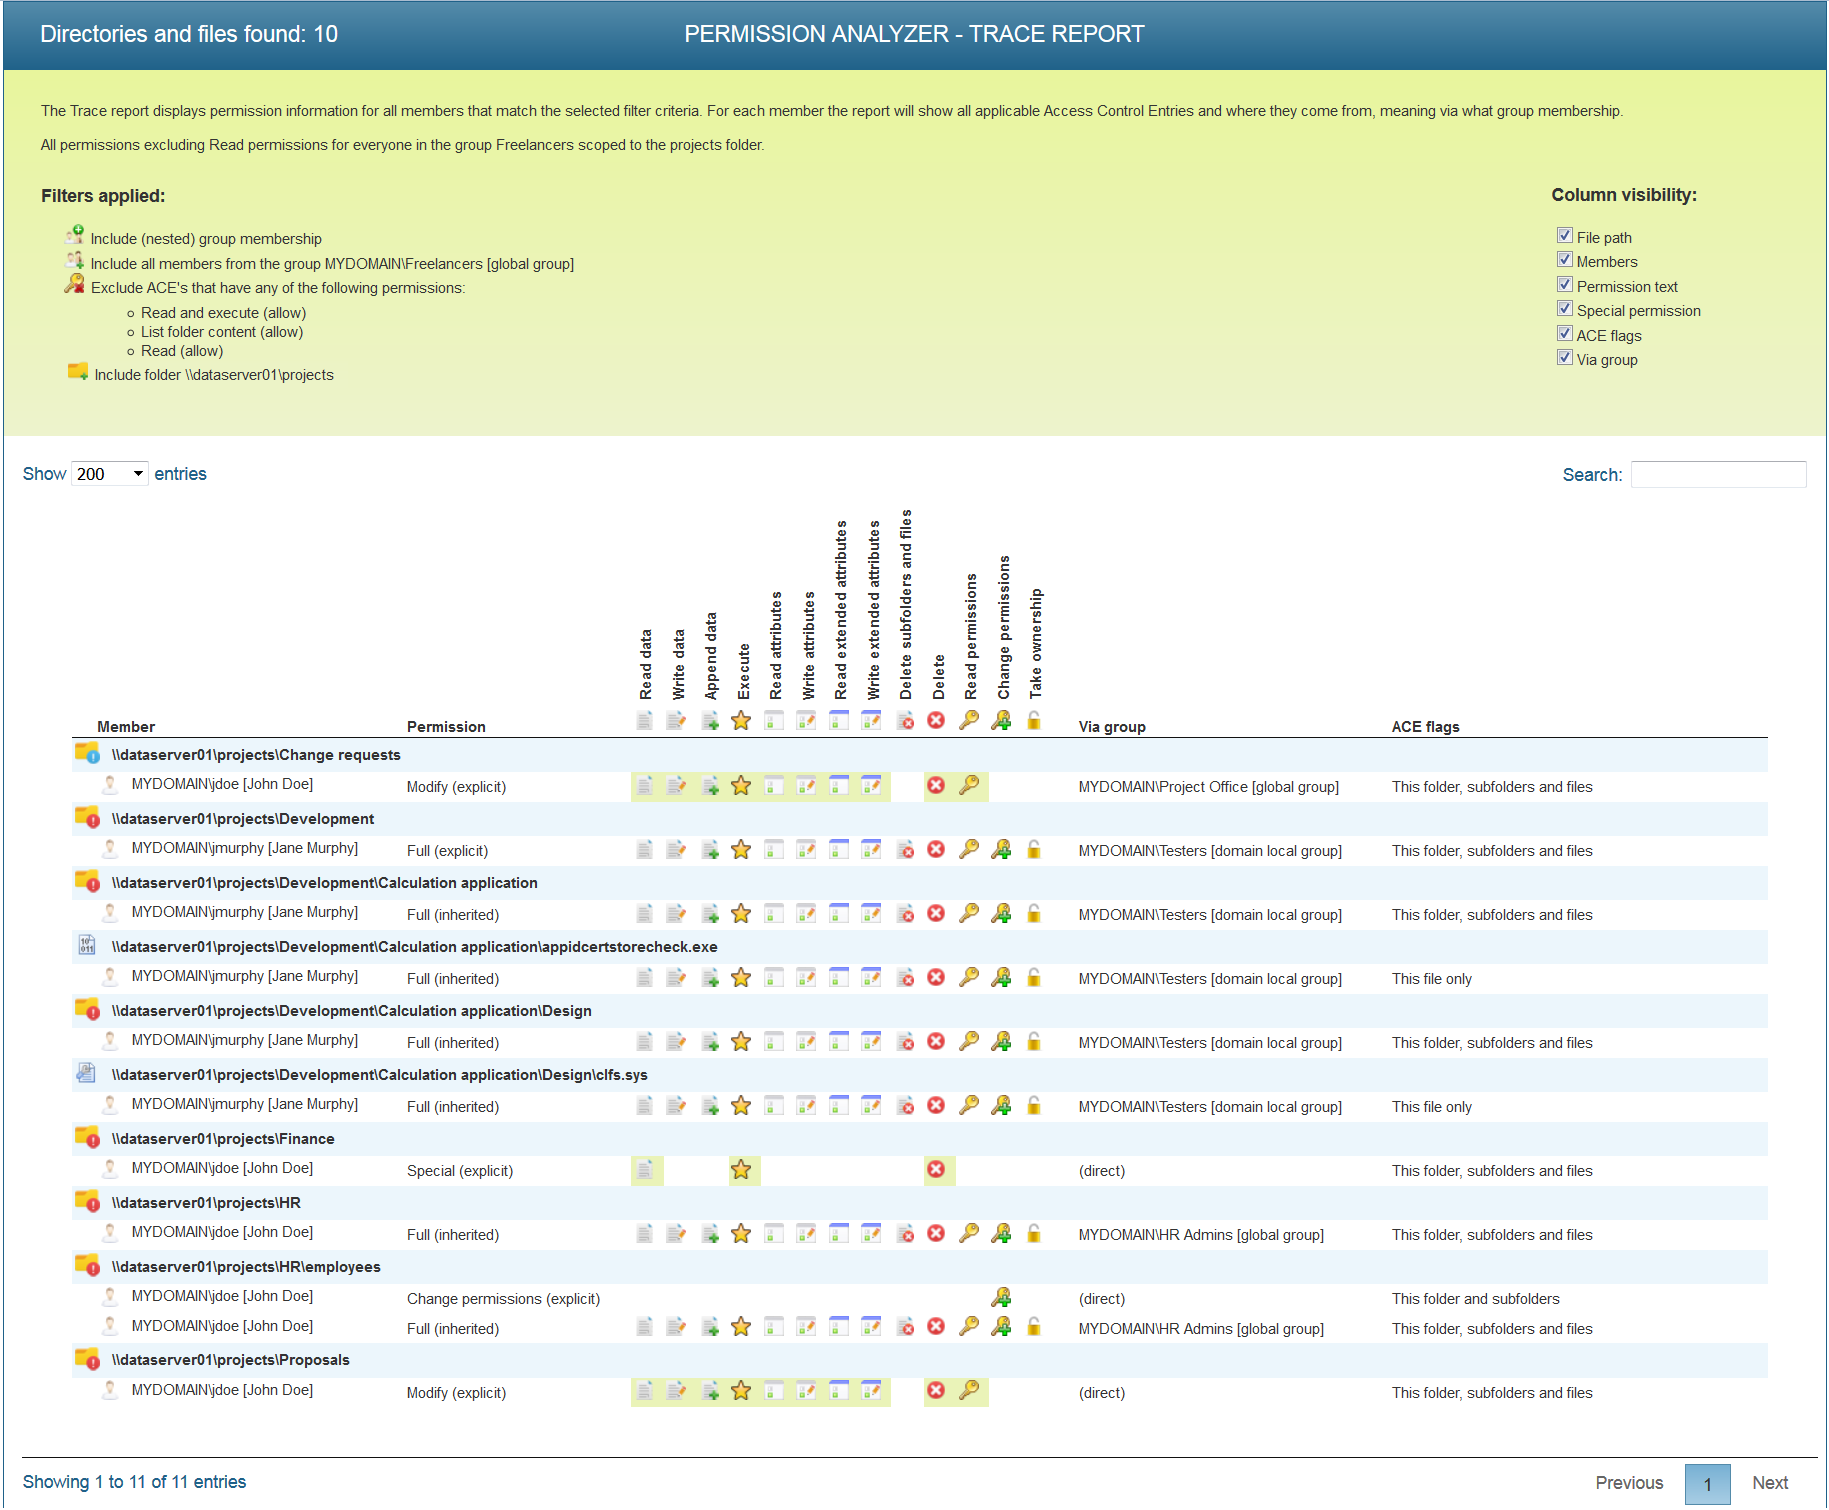
The way a policy report is shown depends on the report type you selected – see Reports and export feature. If you selected the report type Folders/files and matching group members, it may look like the figure below. The report below shows that John Doe has Modify privileges in the “project\Change requests” through the “Project Office” group. It also shows Jane Murphy has full privileges within the “projects\Development” folder, as she is part of the “Testers” group. These results show you who has acquired more permissions than is desirable and where additional permissions have been granted.
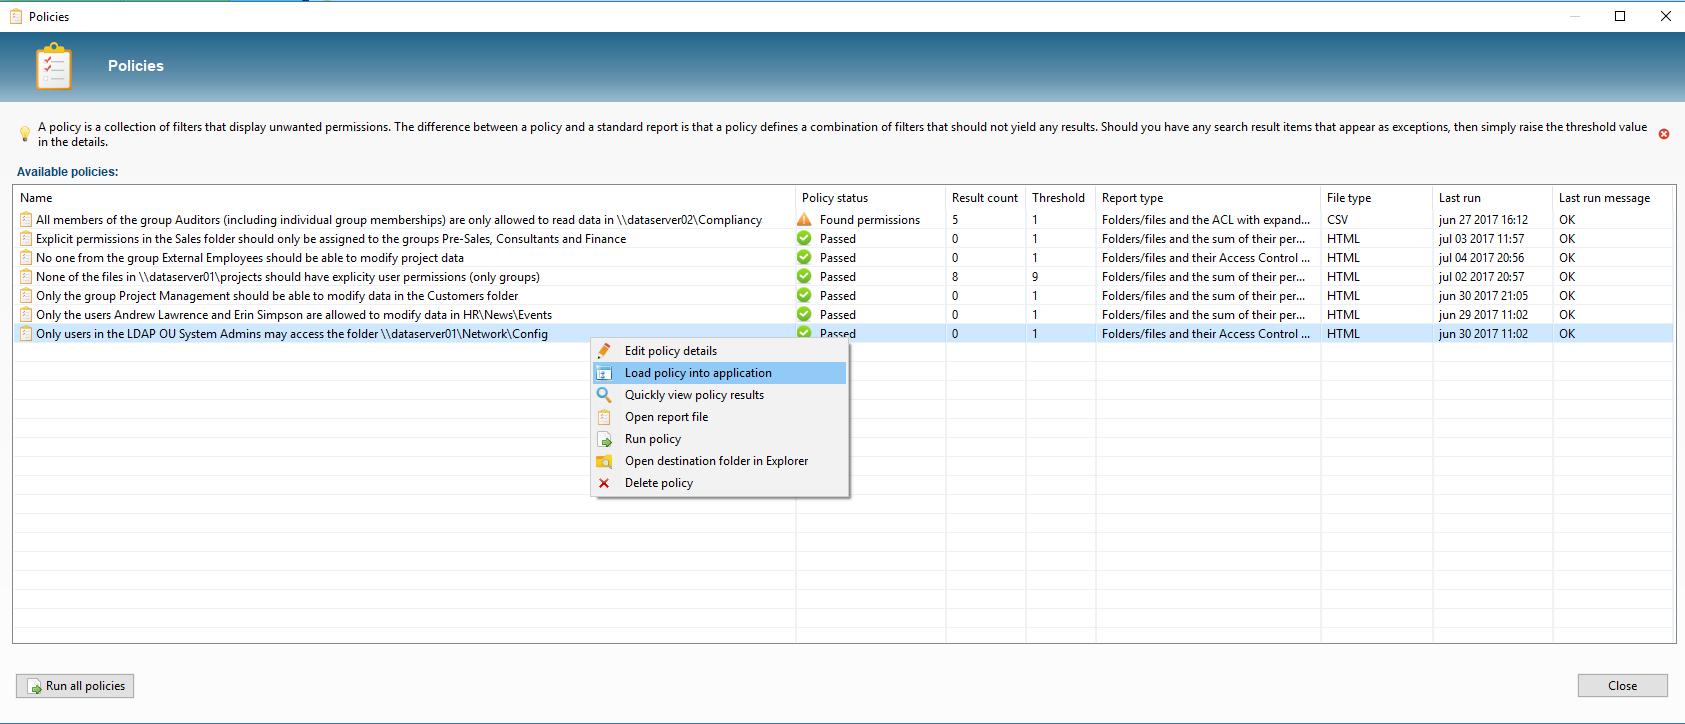
By regularly running the policies via the parameters -scan and -allPolicies, we can periodically check the rights for consistency, without having to check each change in the folder structure manually. In the overview of Policies we can see the status of our rules at a glance and we can zoom in on the unwanted rights by loading a policy in the application:
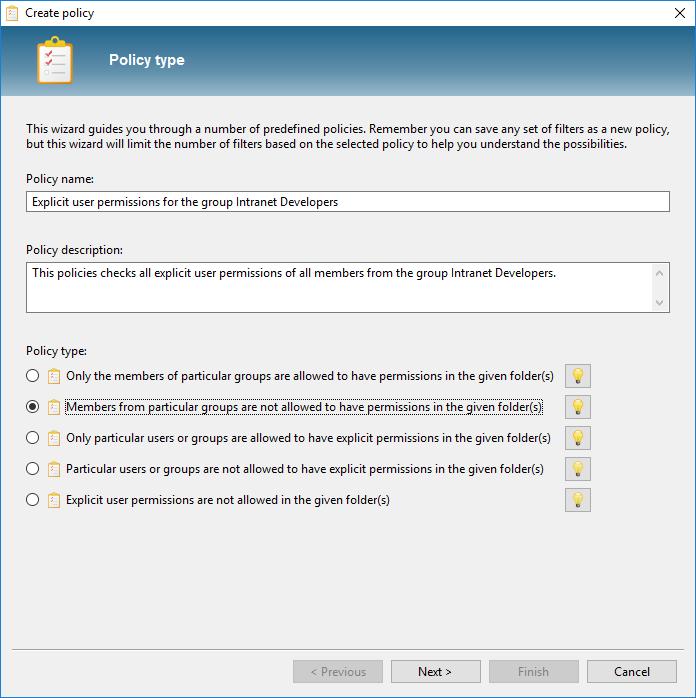
Creating policies using the wizard
Permission Analyzer offers a wizard to help you creating the first policies. It offers a predefined set of policies and guides you through the necessary filters. You can find this wizard in the menu [Policies] > [Open the policy wizard]:
Running policies automatically
Use Permission Analyzer to run policies automatically using the following parameters:
- -policy “myReport”: run a specific policy by name. This parameter can be input a number of times.
- -allPolicies: run all policies.
Permission Analyzer will close automatically after all reports have been exported. See Scheduling jobs feature for more command-line options.